Deploying a FastAPI and Next.js website to Vercel
A straightforward guide on how to deploy a full-stack FastAPI and Next.js app to Vercel, including a ready-to-use code example.
· tutorials · 19 minutes ·
Introduction
This article is a practical guide that presents a single, proven approach for deploying a FastAPI and Next.js application on Vercel. It is not intended to be a comprehensive, in depth overview of all Vercel features or deployment options. The main idea is to show how to host demo apps on Vercel for free.
Python is one of the runtimes with first-class support on Vercel, as stated in the documentation: https://vercel.com/docs/functions/runtimes. Additionally, FastAPI is an officially supported backend framework and is documented here: https://vercel.com/docs/frameworks/backend/fastapi.
Naturally, Next.js is developed by Vercel and has full, native support on the platform. Given all of this, deploying a full-stack FastAPI and Next.js application on Vercel is entirely viable, and we can confidently proceed with the configuration and deployment.
Project structure prerequisites

There are certain constraints on how a FastAPI and Next.js project must be structured and configured in order to be deployable on Vercel. When deploying with Docker, we typically use separate containers for the backend and frontend, since a container is designed to run a single process. Similarly, on Vercel we will use two separate deployments, one for the backend and one for the frontend, and connect them using the SITE_URL and API_URL environment variables.
In general, a full-stack application should be designed without making assumptions about the values of SITE_URL and API_URL, allowing the backend and frontend to be hosted independently on any arbitrary domains.
This is especially important for authentication and cookies, since the frontend and backend will use different *.vercel.app domains. Because these domains are included in the public suffix list (https://publicsuffix.org/list), cookie behavior cannot be fully controlled across them.
One effective solution is to enforce a clean separation of concerns: use FastAPI for authentication logic, and rely on Next.js API routes or server actions for setting and unsetting cookies. I covered this approach in detail in a previous article: https://nemanjamitic.com/blog/2026-02-07-github-login-fastapi-nextjs#architecture-overview.
Note: If your project originally hosts the backend and frontend on the same domain and relies on a reverse proxy such as Nginx or Traefik for routing, you will need to reconfigure this setup, as Vercel does not provide that level of routing control.
Configuration
Vercel offers two basic ways to deploy a project: 1. using the CLI to deploy from a local machine, and 2. deploying from a repository URL, such as Github or Gitlab. There are also several variations of these approaches, including the “Vercel button” which launches a setup wizard from a repository URL, and Github Actions, where the CLI is used inside a workflow runner.
In this tutorial, we will use the CLI approach and deploy both the backend and frontend directly from our local development machine.
We will begin by installing the Vercel CLI globally on our local machine and then logging in with our Vercel account.
# Install Vercel CLIpnpm install -g vercel
# Log in to Vercelvercel login
Configuring the FastAPI backend
vercel.json
First, we need to expose a FastAPI entry point in a way that can be consumed by a Vercel serverless function.
# Required by vercel.json to locate the FastAPI `app` instance.# `# noqa: F401` prevents formatters from removing this import.
from app.main import app  # noqa: F401
Then we can use it in vercel.json to define the build path for the serverless function and the root request handler for HTTP requests.
{ "builds": [ { "src": "app/api/index.py", "use": "@vercel/python" } ], "routes": [ { "src": "/(.*)", "dest": "app/api/index.py" } ]}.vercelignore
Next, we need to define the backend’s root project directory and specify which files should be included or excluded from the serverless function. This step is important to avoid unnecessary bloat, as it affects both performance and the 250 MB size limit for Vercel functions on the free plan. By default, the root project directory is the folder where you run the vercel CLI command, though you can override it during the deployment prompt.
The .vercelignore file is used to exclude files from being uploaded during deployment. It should be placed inside the root project directory. If you already have a properly configured .dockerignore, these two files are basically the same. Below is my .vercelignore configuration:
# Python.venv/__pycache__/.ruff_cache/.mypy_cache/.pytest_cache/app.egg-info*.pyc
# Tests.coveragehtmlcov
Dockerfile*
# ignore database!data/databasedata/database/*!data/database/.gitkeep
You can also verify and debug any redundant files in the Vercel dashboard under My Project -> My Deployment -> Source. I highly recommend performing this check to ensure that no unnecessary bloat is included in the serverless function.
Additionally, add the backend/.vercel/ directory to your .gitignore file. This directory contains local Vercel configuration and should not be committed to Git.
# Local Vercel configuration.vercel/Environment variables
Your application already relies on certain environment variables that are configured in a specific way. However, their names and formats may not fully align with the predefined variables available in the Vercel environment, so some adaptation is usually required. In my case, this involved the following changes:
- I had an
ENVIRONMENTvariable that needed to be derived from the predefinedVERCEL_ENVvariable and then reassigned using a Pydantic model validator. - For the database configuration, I originally used five separate variables:
POSTGRES_SERVER,POSTGRES_PORT,POSTGRES_USER,POSTGRES_PASSWORD, andPOSTGRES_DB. These were replaced with a singleDATABASE_URLvariable, which is exposed by Neon by default. This value can then be piped into aSQLALCHEMY_DATABASE_URIcomputed property.
# Vercel default varsVERCEL_ENV: str | None = None
# ...
# for Vercel and NeonDATABASE_URL: PostgresDsn | None = None
# Local / Docker fallbackPOSTGRES_SERVER: str | None = NonePOSTGRES_PORT: int = 5432POSTGRES_USER: str | None = NonePOSTGRES_PASSWORD: str | None = NonePOSTGRES_DB: str | None = None
# ...
@computed_field  # type: ignore[prop-decorator]@propertydef SQLALCHEMY_DATABASE_URI(self) -> PostgresDsn:    # Vercel + Neon    if self.DATABASE_URL:        database_url = str(self.DATABASE_URL)        # Force SQLAlchemy to use psycopg v3 on Vercel (Neon provides postgresql:// by default)        if database_url.startswith("postgresql://"):            database_url = database_url.replace(                "postgresql://", "postgresql+psycopg://"            )        return database_url
    # Local / Docker    if not all(        [            self.POSTGRES_SERVER,            self.POSTGRES_USER,            self.POSTGRES_PASSWORD,            self.POSTGRES_DB,        ]    ):        raise ValueError(            "Either DATABASE_URL (Vercel/Neon) or POSTGRES_* variables must be set"        )
    return MultiHostUrl.build(        scheme="postgresql+psycopg",        username=self.POSTGRES_USER,        password=self.POSTGRES_PASSWORD,        host=self.POSTGRES_SERVER,        port=self.POSTGRES_PORT,        path=self.POSTGRES_DB,    )
# ...
@model_validator(mode="after")def resolve_environment(self) -> Self:    if self.VERCEL_ENV == "production":        self.ENVIRONMENT = "production"    elif self.VERCEL_ENV == "preview":        self.ENVIRONMENT = "staging"    # else: keep whatever ENVIRONMENT was set from OS/.env    return self
As already noted, SITE_URL is a particularly important variable, as it is the primary way to inform the backend about the domain on which the frontend is hosted. It is used throughout the backend for CORS whitelisting, redirects, constructing absolute URLs, etc.
You may not have this value available during the initial backend deployment. In that case, you can temporarily set a placeholder value to satisfy Pydantic validation. Once the actual frontend URL is known, update the variable via the Vercel dashboard or CLI and redeploy the application for the change to take effect.
Below is the full list of required and optional environment variables used by this backend application:
# ------------ Required vars --------------
# Frontend url# Used by the backend to generate links in emails to the frontendSITE_URL=my-frontend-url.vercel.app
# AuthJWT_SECRET_KEY=my-secretSESSION_SECRET_KEY=my-secret
# Superuser email and passwordFIRST_SUPERUSER=admin@example.comFIRST_SUPERUSER_PASSWORD=password
# Postgres database, e.g. Neon# Format: postgresql://<username>:<password>@<host>/<database>?<query># Neon example: postgresql://neondb_owner:npg_someHash@ep-solitary-moon-some-hash-pooler.c-3.us-east-1.aws.neon.tech/neondb?sslmode=requireDATABASE_URL=
# ------------ Optional vars --------------
# Used in email templates and OpenAPI docsPROJECT_NAME="Full stack FastAPI template Next.js"
# Whitelisted frontend urls# SITE_URL is included by defaultBACKEND_CORS_ORIGINS="http://localhost,https://localhost,http://localhost:3000,https://localhost:3000,http://localhost:3001,https://localhost:3001,https://my-frontend-url.vercel.app"
# Environment: local, staging, production# If omitted defaults to VERCEL_ENVENVIRONMENT=production
# If omitted defaults to 7 days = 24 * 7 = 168 hoursACCESS_TOKEN_EXPIRE_HOURS=168
# Github OAuth id and secret# Only a single deployment (callback url) per Github app is possibleGITHUB_CLIENT_ID=GITHUB_CLIENT_SECRET=
# Postgres database, e.g. Neon# Supply either all POSTGRES_* variables or a single DATABASE_URL# If both are defined DATABASE_URL has precedencePOSTGRES_SERVER=localhostPOSTGRES_PORT=5432POSTGRES_DB=appPOSTGRES_USER=postgresPOSTGRES_PASSWORD=password
Database migrations and seed
At this point, the only remaining step is to obtain a valid DATABASE_URL that points to a migrated, seeded, and running database instance. You can use any cloud or self-hosted PostgreSQL instance, as long as it is accessible over the internet. In this case, we will use Neon, since it is an officially supported PostgreSQL integration on Vercel.
Create an account at https://neon.com, then create a new project and a new database. Next, connect the database to your Vercel project using the Neon integration and use the default production database branch. When the integration is added, Neon will automatically expose certain environment variables to your Vercel deployment, which you can customize in the Neon integration settings. The DATABASE_URL variable is exposed by default, and since we configured the backend to use it in the previous step, no further action is required at this stage.
At this point, the backend can connect to the database, but the database is still empty. We now need to run migrations to create the tables and seed the initial data.
Note: You might be tempted to automate database migrations and seeding (especially for demo apps) by running them on application startup. However, since Vercel is a serverless environment, there is no single, well-defined application start event (unlike a VPS or Docker-based setup). Instead, multiple instances can start independently, which would cause migrations and seeds to run multiple times in an unpredictable manner. This can lead to serious issues. For this reason, database migrations and initial seeding should be performed as a single, manual step.
We will use our local development environment, where the application is already fully installed and configured, to run the migrations and seed the data. In the local .env file, simply replace the local development database connection with the remote production database connection that is already used by the Vercel deployment.
Also, make sure to check out the vercel-deploy branch locally, as only that branch is configured to handle the DATABASE_URL variable correctly.
# Checkout vercel-deploy branch that has Vercel configuration (backend/vercel.json, backend/.vercelignore, backend/app/api/index.py, modified backend/app/core/config.py)git checkout vercel-deploy# Comment out local Postgres database# POSTGRES_SERVER=localhost# POSTGRES_PORT=5433# POSTGRES_DB=app# POSTGRES_USER=postgres# POSTGRES_PASSWORD=password
# Neon database url example used on Vercel:DATABASE_URL=postgresql://neondb_owner:npg_some-slug@ep-rough-cherry-some-slug-pooler.c-3.us-east-1.aws.neon.tech/neondb?sslmode=requireNow we can run the migrations and seed the Neon remote database. Make sure that all backend dependencies are installed and that your Python virtual environment is activated. Be patient and allow the command to complete, as this process can take a few minutes.
# From /backendcd ./backend
# Create virtual environmentuv venv
# Activate the environmentsource .venv/bin/activate
# Install dependenciesuv sync
# Migration and seed scripts need activated venv and Python dependencies
# Await db, run migrations and seed (must have .env)# With a remote Neon database, this command can take a few minutes to complete# Be patient and do not interrupt itbash scripts/prestart.sh
Open the Neon dashboard and verify that the user and item tables have been created and populated with the seed data. At this point, the backend is fully configured and ready to be deployed using the Vercel CLI.
Deploying backend from terminal
First, install the vercel CLI and log in with your Vercel account. Then navigate to the backend directory and start the deployment wizard by running the vercel --prod command. The wizard will prompt you to:
- Link an existing Vercel project or create and name a new one (this determines the app’s public URL)
- Select the project root directory - choose the current directory (
./) - Set environment variables - this step can be skipped for now
- Modify the build configuration - select “No”
# Install Vercel CLIpnpm install -g vercel
# Log in to Vercelvercel login
# Navigate to the backend foldercd backend
# Deploy for the first time (production)# Fill prompts for name, root directory `./` (vercel.json dir)vercel --prod
# Add required environment variables (production) (after the wizard completes)echo "Full stack FastAPI template Next.js" | vercel env add PROJECT_NAME productionecho "https://my-frontend-url.vercel.app" | vercel env add SITE_URL productionecho "my-secret" | vercel env add JWT_SECRET_KEY productionecho "my-secret" | vercel env add SESSION_SECRET_KEY productionecho "admin@example.com" | vercel env add FIRST_SUPERUSER productionecho "password" | vercel env add FIRST_SUPERUSER_PASSWORD productionecho "postgresql://user:pass@host/db" | vercel env add DATABASE_URL production# Set more optional variables...
# List existing environment variablesvercel env ls
# Redeploy after changesvercel --prod  # production
# After deploy, the CLI outputs the URL# Example: https://api-full-stack-fastapi-template-nextjs-my-slug.vercel.app
# Debug deploymentvercel inspect https://api-full-stack-fastapi-template-nextjs-my-slug.vercel.app --json
Treat the initial deployment as disposable. At this stage, the frontend is likely not deployed yet, which means the SITE_URL value is not available. You can temporarily set a placeholder URL that satisfies Pydantic validation. Once the frontend is deployed, update SITE_URL with the actual value using the CLI (as shown earlier) or via the Vercel dashboard (Project -> Settings -> Environment Variables).
The same approach applies to other environment variables, such as GITHUB_CLIENT_ID and GITHUB_CLIENT_SECRET. After updating any environment variable, you must redeploy the project for the changes to take effect.
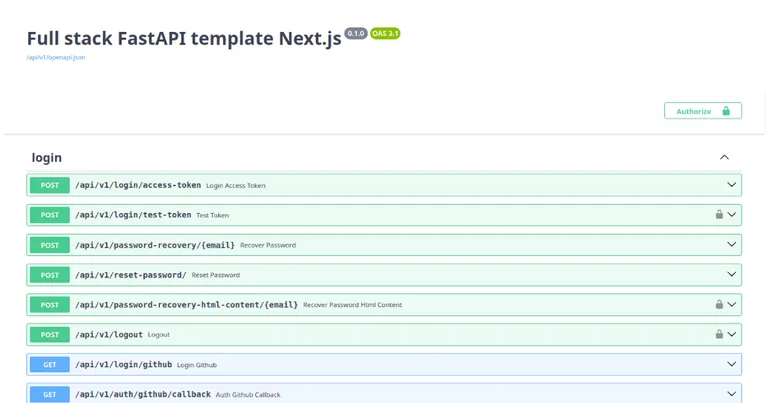
# Update (remove and add) an existing env var SITE_URLvercel env rm SITE_URL production --yesecho "https://my-new-frontend-url.vercel.app" | vercel env add SITE_URL productionOnce the deployment wizard completes successfully, you can verify the result by accessing the FastAPI backend at the URL printed in the terminal, for example: https://api-full-stack-fastapi-template-nextjs-my-slug.vercel.app/docs.
This will display the OpenAPI UI. The exact URL depends on how you named the project. You can view all associated URLs in the Vercel dashboard under the deployment settings.
Configuring the Next.js frontend
Deploying the Next.js application is much simpler, as it requires fewer environment variables and no database. However, there are still a few details to keep in mind, which we will cover here.
vercel.json
We use a vercel.json file to specify the framework, install and build commands, and the output directory. These settings mirror the local development environment and are pretty self-explanatory.
{ "framework": "nextjs", "installCommand": "pnpm install", "buildCommand": "pnpm turbo run build --filter=web", "outputDirectory": ".next"}Note that our Next.js application uses a monorepo setup with Turbo, which has a few implications:
- The
vercel.jsonfile is NOT placed at the monorepo root (frontend/). Instead, it lives in the Next.js application directory atfrontend/apps/web/vercel.json. Despite this, the Vercel project root directory IS the monorepo root (frontend/), since all packages and source files must be uploaded in order to build the application successfully. This is the correct approach for deploying monorepo projects to Vercel. - The
.vercelignorefile should also be placed in the monorepo root directory (frontend/).
.vercelignore
As with the backend, we need to ignore all unused local files during deployment to prevent unnecessary uploads, performance degradation, and excess bloat, and to stay below the 250 MB limit for a serverless function. Once again, it is a good idea to verify that nothing was missed by checking My Project -> My Deployment -> Source in the Vercel dashboard.
# Node.js**/node_modules/**/.next/**/.turbo/**/dist/
# Ignore all env files, env vars are passed into container explicitly**/.env*
# Tests**/test-results/**/playwright-report/**/blob-report/**/playwright/.cache/
Similarly, add the frontend/.vercel/ directory to your frontend .gitignore file. This directory contains local Vercel configuration and should not be committed to Git.
# Local Vercel configuration.vercel/Environment variables
The frontend uses far fewer environment variables, only two in fact: API_URL, which points to the backend URL, and SITE_URL, which represents the frontend’s own URL. The value of SITE_URL can be derived from the predefined VERCEL_PROJECT_PRODUCTION_URL variable exposed by Vercel.
# ------------ Required vars --------------
# Backend urlAPI_URL=https://my-backend-url.vercel.app
# ------------ Optional vars --------------
# Frontend url# If omitted defaults to https:// + VERCEL_PROJECT_PRODUCTION_URLSITE_URL=https://my-frontend-url.vercel.app
With this in mind, we need to include VERCEL_PROJECT_PRODUCTION_URL in the Next.js environment variable handling logic.
Set it as a fallback value in the next-public-env schema.
export const { getPublicEnv, PublicEnv } = createPublicEnv( { NODE_ENV: process.env.NODE_ENV, SITE_URL: process.env.SITE_URL || `https://${process.env.VERCEL_PROJECT_PRODUCTION_URL}`, API_URL: process.env.API_URL, }, { schema: (z) => getProcessEnvSchemaProps(z) }Include it in the process.env type.
declare namespace NodeJS { interface ProcessEnv { readonly NODE_ENV: 'development' | 'production' | 'test'; readonly SITE_URL: string; readonly API_URL: string; readonly VERCEL_PROJECT_PRODUCTION_URL: string; }}Notify Turborepo.
{  "$schema": "https://turbo.build/schema.json",  "ui": "tui",  "globalEnv": ["NODE_ENV", "SITE_URL", "API_URL", "NEXT_RUNTIME", "VERCEL_PROJECT_PRODUCTION_URL"],
  // ...
}
That’s it. Our Next.js frontend is ready for deployment.
Deploying frontend from terminal
Deploying the frontend is very similar to deploying the backend, with the main difference being the selection of the project root directory, since we are deploying a monorepo. Navigate to the frontend directory and start the deployment wizard by running the vercel --prod command. The wizard will prompt you to:
- Link an existing Vercel project or create and name a new one (this determines the app’s public URL)
- Select the project root directory - choose the Next.js app directory (
./apps/web/) - Set environment variables - this step can be skipped for now
- Modify the build configuration - select “No”
# Install Vercel CLIpnpm install -g vercel
# Log in to Vercelvercel login
# Navigate to the frontend foldercd frontend
# Deploy for the first time (production)# Fill prompts for name, root directory `./apps/web/` (vercel.json dir)vercel --prod
# Set required environment variables (production)echo "https://api-full-stack-fastapi-template-nextjs-my-slug.vercel.app" | vercel env add API_URL production# Set more optional variables...
# List existing environment variablesvercel env ls
# Redeploy after changesvercel --prod  # production
# After deploy, the CLI outputs the URL# Example: https://full-stack-fastapi-template-nextjs-my-slug.vercel.app
# Debug deploymentvercel inspect https://full-stack-fastapi-template-nextjs-my-slug.vercel.app --json
Make sure to set the environment variables API_URL and SITE_URL (optional), either through the Vercel dashboard (Project -> Settings -> Environment Variables) or via the CLI. If SITE_URL is not set, it will fall back to the predefined VERCEL_PROJECT_PRODUCTION_URL variable, as explained earlier.
Remember to redeploy the project whenever you update environment variables to apply the changes.
# Update (remove and add) an existing env vars API_URL and SITE_URL
vercel env rm API_URL production --yesecho "https://api-full-stack-fastapi-template-nextjs-my-slug.vercel.app" | vercel env add API_URL production
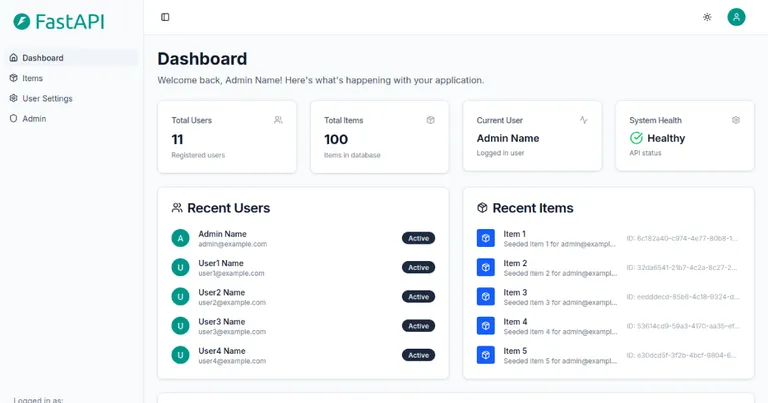
vercel env rm SITE_URL production --yesecho "https://full-stack-fastapi-template-nextjs-my-slug.vercel.app" | vercel env add ITE_UR productionIf everything is configured correctly, your full-stack FastAPI and Next.js application should now be fully deployed and functional at the URL displayed in the terminal: https://full-stack-fastapi-template-nextjs-my-slug.vercel.app
The exact URL will depend on the name you chose for the project. Congratulations!
Vercel button
In addition to the CLI, Vercel also allows deploying a project by simply specifying the repository URL. Naturally, the repository must be properly prepared and configured beforehand. One variation of this method is the “Vercel Deploy” button, a URL-encoded href link that points to Vercel and includes query parameters for the repository URL, environment variables, integrations, and other necessary configuration details. When clicked, it launches a setup wizard to complete any remaining deployment configuration.
Vercel also provides a utility form to generate these buttons conveniently: https://vercel.com/docs/deploy-button. The “Vercel Deploy” button can be embedded in markdown or HTML pages, allowing visitors to deploy a live demo of your project quickly and effortlessly.
With this in mind, we can define a single “Vercel Deploy” button to deploy both the backend and frontend of our FastAPI and Next.js project. It will clone a single Github repository and create two separate Vercel projects. We can then include the button’s Markdown in the project’s README.md file.
The button below specifies URLs (repository, demo, images, etc.) for this particular example, you can adjust them to match your own URLs.
Single monorepo Vercel button
This is fairly self-explanatory, but let’s clarify the query parameters for completeness:
repository-url- points to the Github repository and thevercel-deploybranch.repository-name- the name of the cloned repository.root-directories- specifies the backend (backend) and frontend root directories (frontend/apps/web).monorepo- indicates that a single Git repository contains multiple Vercel projects.totalProjects- number of Vercel projects to create.
Additional parameters include:
project-names- the names the backend and frontend Vercel projects.demo-*- information and URLs displayed in the wizard for demo purposes.
The products parameter is particularly important, as it activates the Neon integration in the wizard to provision a new PostgreSQL database.
# URL for the "Vercel Deploy" button's href attribute
https://vercel.com/new/clone?repository-url=https://github.com/nemanjam/full-stack-fastapi-template-nextjs/tree/vercel-deploy&root-directories=frontend/apps/web,backend&repository-name=full-stack-fastapi-template-with-next-js&monorepo=1&totalProjects=2&project-names=full-stack-fastapi-frontend,full-stack-fastapi-backend&demo-description=Build full-stack apps with Next.js and FastAPI.&demo-image=https://github.com/nemanjam/full-stack-fastapi-template-nextjs/raw/main/docs/screenshots/frontend-screenshot-1200x630.png&demo-title=Full stack FastAPI template with Next.js&demo-url=https://full-stack-fastapi-template-nextjs.vercel.app&skippable-integrations=1&products=[  {    "type": "integration",    "integrationSlug": "neon",    "productSlug": "neon",    "protocol": "storage"  }]
Once the URL is constructed, it should be URL-encoded and then embedded in the markdown (or HTML) as shown below.
<!-- Markdown for the button -->
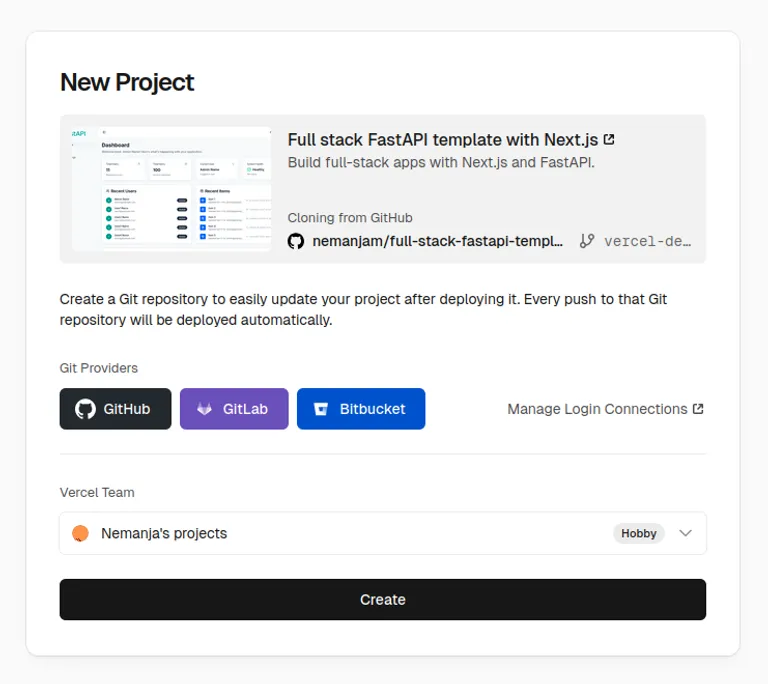
[](urlencoded-url-from-above)The button and wizard will clone a single GitHub repository and create and deploy two separate backend and frontend Vercel projects. The deployments are not functional at this point. The wizard will not set any required environment variables for either the backend or frontend projects. Users will need to set the appropriate environment variables themselves in the Vercel dashboard.
The wizard will also create an integration that provisions an unassigned, blank Neon database. Users will then need to assign the integration to the backend project and run migrations and seed the database manually, as described in the previous section: Database migrations and seed.
After clicking the “Vercel Deploy” button, the user will be taken to a form wizard, as shown below.
Note: You can also use two separate “Vercel Deploy” buttons to clone the backend and frontend as two Github repositories (and deploy them as two Vercel projects). This approach allows you to include the list of environment variables and their default values (env, envDefaults, and envDescription parameters) in the button’s URL.
You can see examples of such buttons at the following links: vercel-button-backend.md, vercel-button-frontend.md
Completed code and demo
- Repository and branch: https://github.com/nemanjam/full-stack-fastapi-template-nextjs/tree/vercel-deploy
- Demo frontend: https://full-stack-fastapi-template-nextjs.vercel.app
- Demo backend: https://api-full-stack-fastapi-template-nextjs.vercel.app/docs
The relevant branch vercel-deploy and files:
git clone git@github.com:nemanjam/full-stack-fastapi-template-nextjs.git
# Checkout the vercel-deploy branchgit checkout vercel-deploy
# Backendbackend/vercel.jsonbackend/.vercelignore
backend/app/api/index.pybackend/app/core/config.py
.env.vercel.exampledocs/notes/vercel-deployment-backend.md
# Frontendfrontend/apps/web/vercel.jsonfrontend/.vercelignore
frontend/apps/web/src/config/process-env.tsfrontend/apps/web/src/env.d.tsfrontend/turbo.json
frontend/apps/web/.env.vercel.exampledocs/notes/vercel-deployment-frontend.md
# Compare branches in a clear diffhttps://github.com/nemanjam/full-stack-fastapi-template-nextjs/compare/vercel-deploy?expand=1
# Compare specific commits in a clear diffhttps://github.com/nemanjam/full-stack-fastapi-template-nextjs/compare/45c840d48cba2aeab07e0a66f8245110b852571e...e5fa4b4af3c19c8c2c584fe437b7298f9e342083
Conclusion
Vercel is a quite viable option for hosting full-stack FastAPI and Next.js demo projects for free. It works well when the project is designed around serverless constraints. Keeping the backend and frontend as separate deployments, using environment variables consistently, and handling database migrations manually results in a setup that is simple, predictable, and reliable on the free tier.
This guide focused on one practical approach that is easy to reproduce and debug. With the provided repository and Vercel Deploy buttons, you can use this setup as a solid baseline for demos, prototypes, or small production projects.
Have you done something similar yourself and used a different approach? Leave a comment below, I’m happy to hear your opinions.
References
- Vercel docs, supported runtimes https://vercel.com/docs/functions/runtimes
- Vercel docs, supported backend frameworks https://vercel.com/docs/frameworks/backend/fastapi
- Vercel docs, deploying Next.js https://vercel.com/docs/frameworks/full-stack/nextjs
- Vercel docs, deploy button form https://vercel.com/docs/deploy-button
- Neon integration example template https://github.com/neondatabase/vercel-marketplace-neon
More posts
-
Comparing BFS, DFS, Dijkstra, and A* algorithms on a practical maze solver example
Understanding the strengths and trade-offs of core pathfinding algorithms through a practical maze example. Demo app included.
-

Expose home server with Rathole tunnel and Traefik
Bypass CGNAT permanently and host websites from home.
-
Next.js server actions with FastAPI backend and OpenAPI client
Connect Next.js to a FastAPI backend while preserving a modern React workflow with server actions and server components.